
A burst of sub-zero air, a silent house, and a tap that coughs instead of flowing. Frozen pipes never pick a good time. They creep in before dawn, when the heating’s off and your schedule is tight. The fix people swear by? A humble hairdryer and a little patience.
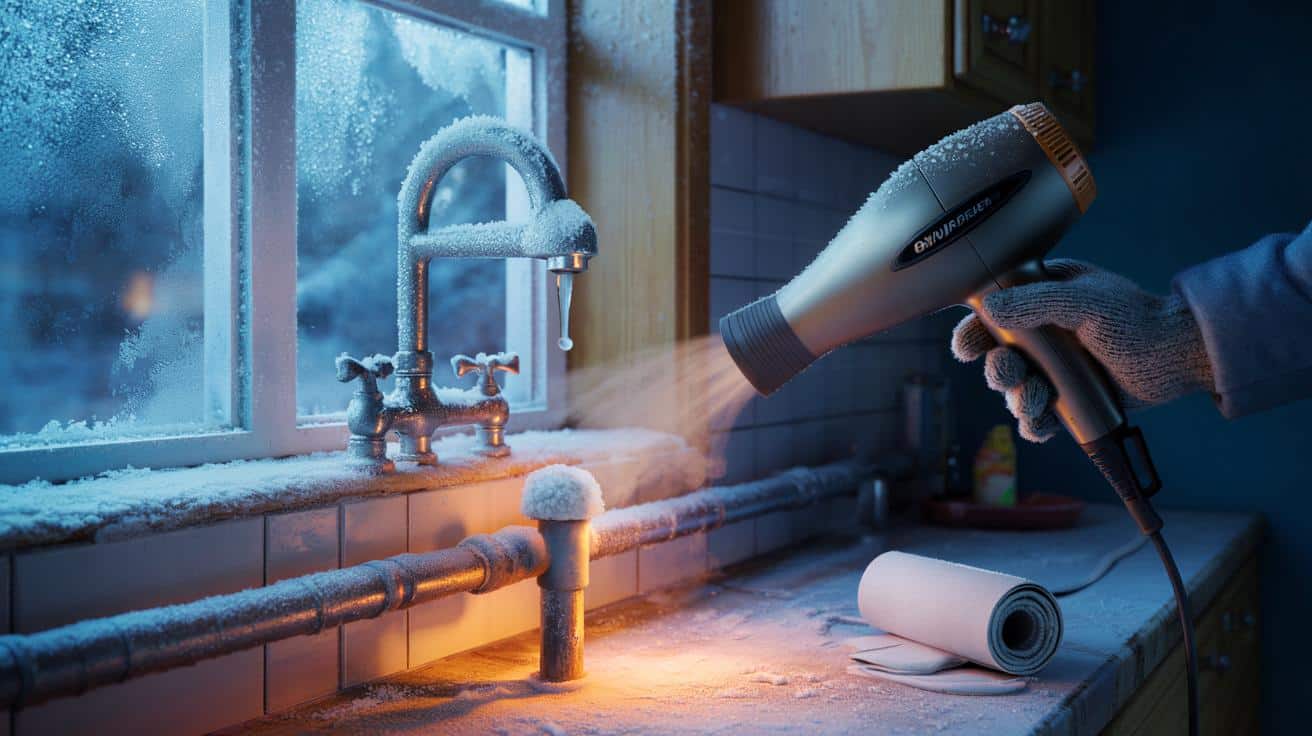
I watched a neighbour in a bobble hat coax life back into a kitchen tap with the calm of someone defusing a bomb. He didn’t fetch a blowtorch or a toolkit. He plugged in his partner’s hairdryer, cracked the cold tap a fraction, and aimed warm air at a short run of pipe that hugged an outside wall.
Steam rose, the metal clicked, and there it was: a single, hopeful drip. Then a trickle. Then a low, relieved laugh. *It sounds daft, but a humble hairdryer can be the hero.* The trick is knowing where to start—and where not to.
Why a hairdryer works on frozen pipes
Water freezes first in the coldest spans: garages, lofts, under-sink voids, or sections that press against an exterior wall. A hairdryer delivers gentle, targeted warmth that nudges ice from solid to slush without shocking the pipe. That steady heat avoids the stress that faster, harsher methods can cause.
We’ve all had that moment when a tap won’t play ball and panic taps on the shoulder. In those early minutes, the pipe isn’t usually split. It’s just blocked. Warm air helps restore flow quickly, and you can often coax the first drips in seconds. A few minutes of sweeping heat can save a morning of stress—and a plumber’s bill.
The physics is simple. Ice expands as it forms, clamping the pipe and bottling pressure behind it. Tackle the section nearest the tap first, and you give thawed water somewhere to go. You don’t want to heat a sealed segment; you want to free a path so the ice can melt and move safely. That’s why the order matters.
Step-by-step: defrost in seconds, flow in minutes
Open the affected tap slightly—cold side first—and locate the likely freeze point: look for cold spots, frosted sections, or areas in draughty voids. Plug the hairdryer into an RCD-protected socket, set to medium heat and low to medium airflow, and keep it 10–15 cm from the pipe. Sweep along the pipe starting from the tap end and moving towards the colder section. You’re aiming for that first drip, not a sauna.
Keep the dryer moving and avoid concentrating heat on joints, meters, or valves. If you see bulging, leaks, or any sign of a split, close the stopcock immediately and call a pro. Don’t use the hairdryer in standing water or damp crawl spaces. Let’s be honest: nobody drains garden taps every single frosty night, but a few careful minutes here beats a ceiling downpour next week.
Once the first trickle appears, stay calm and steady. Increase the sweep length, working a little further each pass, and let the tap’s gentle flow clear slushy bits.
“The hairdryer is safe because it’s slow,” says James, a North London plumber. “Heat evenly, give the water somewhere to go, and you’ll win without cracking the pipe.”
- Open the tap: a quarter turn is enough to relieve pressure and signal progress.
- Keep the hairdryer moving: smooth sweeps, 10–15 cm away, no hot spots.
- Never use a flame: torches and heaters can soften solder, warp plastic, and start fires.
The pitfalls to dodge and how to spot a hidden freeze
Plastic and copper both respond well to gentle heat, but fittings can be fragile. Avoid blasting push-fit joints or flexible hoses. If the pipe runs behind a backboard, warm the cavity air first and take your time. If nothing changes after 10 minutes, widen the search—under the floor, in the loft, or near the incoming mains.
Many freezes start where insulation is thinnest: a metre from the tap rather than right under it. If you can’t find a frosty patch, follow the “cold chain” with your hand and a torch, feeling for sections that sting your fingers. A slow sweep with the hairdryer along that line often sparks a drip in seconds once you cross the true pinch point.
If the pipe feeds a toilet or appliance, isolate the appliance and work on exposed lengths first. No luck and you can hear a hiss or spot damp patches? Stop. Close the stopcock, open the lowest and highest taps to drain, and get a plumber in. Frozen pipes are patient; bursting is instant—and messy.
What this tiny fix changes
There’s a big psychological shift in watching a dead tap spring back with something as ordinary as a hairdryer. It’s control, not chaos. You catch the problem early, you warm the right part, and you keep the story boring—a story where the ceiling doesn’t collapse and the hallway doesn’t smell like a paddling pool.
Once flow returns, wrap that now-warmed span with pipe insulation or even a temporary towel while you source proper lagging. Nudge the thermostat a degree in the cold snap, and leave cupboard doors open around sinks so warm air circulates. A tiny bit of foresight and a £15 length of foam can turn this winter into a non-event.
There’s no glory in preventing a leak. No applause. Just a quietly normal day where the school run isn’t cancelled and the weekend budget stays intact. Soyons honnêtes : personne ne fait vraiment ça tous les jours. But future-you will be grateful you did it this once.
150-word synthesis
A hairdryer won’t rewrite winter, yet it can flip the script on a frozen morning. It’s the right kind of heat: focused, forgiving, and controlled. Open the tap a touch, aim warmth at the tap-side section, and let the first drip tell you the ice has a way out. Work in short, steady sweeps. Respect joints and fittings. Stop if you see bulges or hear anything suspicious, and shut the water if things go sideways.
Share this with a neighbour who’s eyeing their pipes like a horror film prop. Save the blowtorch for TikTok stunts you’ll never try. Warm air, a calm hand, and a little patience beats drama every time. The secret isn’t magic; it’s method. The win isn’t instant flow; it’s that tiny first drip—the moment the pipe decides to play nice again.
| Key point | Detail | Interest for the reader |
|---|---|---|
| Start at the tap end | Create a path for meltwater to escape before heating colder sections | Reduces pressure, speeds the first drip, lowers burst risk |
| Gentle, moving heat | Medium setting, 10–15 cm distance, smooth sweeps along the pipe | Fast results without damaging joints or fittings |
| Know when to stop | Bulges, leaks, or no progress after 10 minutes = shut off and call a pro | Avoids costly damage and wasted time |
FAQ :
- How long should it actually take?Often you’ll see the first drip within seconds once you hit the right spot. Full flow can take a few minutes on a short run.
- Is a hairdryer safe on plastic pipes?Yes, with moderate heat and constant movement. Avoid heating push-fit joints directly and don’t linger on one point.
- What if I don’t know where the freeze is?Follow the coldest run towards an exterior wall, loft, or garage. If nothing shifts, expand the search and warm cavity air near boxed-in sections.
- Can I use a heat gun instead?A heat gun runs hotter and can damage pipes or soften solder. A hairdryer is kinder and far less risky for DIY thawing.
- What should I do to prevent a repeat?Lag exposed spans, seal draughts, open sink cupboards on frosty nights, and keep a gentle overnight heat in problem rooms.


Just tried this on the kitchen cold line—got a drip in under a minute. Definately saved me a morning panic. Didn’t even use high heat. Cheers for the “keep it moving” tip!